

|
Content | User documentation | Administrator documentation | Index of terms | Technical Support | Search on-line |
| FaxChange Installation |
This document describes installation of FaxChange Server. Read following document first, please: Before installation.
You can install all basic and add-on Faxchange components from the installation CD.
All components can be installed by runnig program autorun.exe from root of installation CD. If your
CD drive supports Autorun feature, setup will run automatically. Select Faxchange
from the UMS products and now you can select what component you want to install.
Electronic documentation can be found on the CD in file faxchange\doc\uk\index.html
You should know the following data before installing the FaxChange:
Next it is necessary to do the preparation work:
At this point you have finished preparation work and now you can start the installation.
When you start the installation you can select one of three valid options:
The following table shows a general overview of the installation types:
| Installation type | Destination directory | Database type | Note |
| Express | Automatic | MS Access | |
| Custom | Custom | Supported MS Access, MS SQL or Oracle SQL server (if ODBC drivers are installed and module is licensed) | Exchange directory structure can be used |
| Advanced | Custom | Supported MS Access, MS SQL or Oracle SQL server (if ODBC drivers are installed and module is licensed) | Allows to distribute installation to several servers and to use Exchange directory structure |
If you want to add another gateway into existing installation, use _gateway.cmd script from setup folder.
The whole installation is controlled by wizard which asks for certain informations and controls installation according
answers. When you run setup (by autorun or by faxchange\i386\server\setup\setup.exe program) some supporting
files will be copied to the harddisc first. Restart can be required - in such case restart your server and run setup again.
Then first dialog of the wizard will be displayed.
Here you can read license agreement - you must agree to be able to continue.
Second dialog allows you to read installation documentation from the CD; we recommend to see also online
Faxchange web.
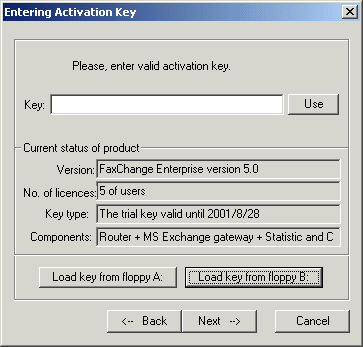 Then enter key for the Faxchange activation. The key consists of four groups of letters and numbers and it
contains coded FaxChange version, number of users, eventual time limit and available components. Enter the key
into the "Key" field and press the Use button. If you used a correct key type it will be displayed in the
"Current status of Faxchange" field.
If you encounter a message "The key is invalid", check if you haven't interchanged similar characters, as "l" and "1",
"o" and "0" and so on.
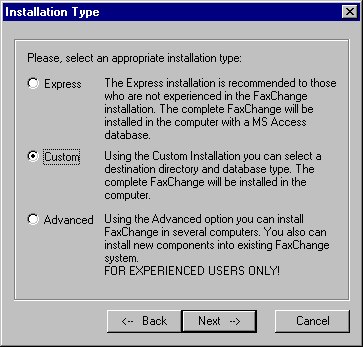 In the following window select installation type - see table above. In the next part we assume you have selected
custom installation and we notice for differences from express installation.
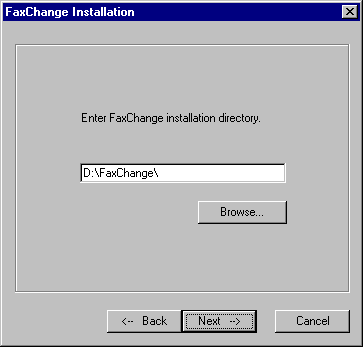 Now select installation folder for Faxchange (this dialog is missing in express installation, where is automatically
selected "Faxchange" folder on the system drive).
ATTENTION! Folder name must not contain space, otherwise Faxchange will not work
correctly.
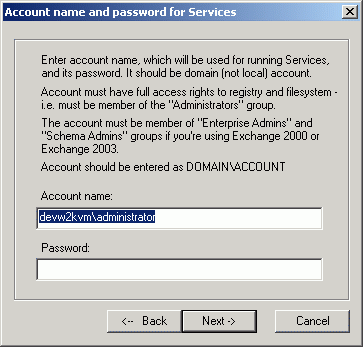 Proceed to the next screen. Enter service account and password here under which FaxChange operates.
This account must be member of Administrators group and it must also have the administration's authority on
Exchange server. We usually use the same account under which Exchange server works. Account can be specified
as local in <servername\account_name> form or as domain in the <domain\account_name> form.
Because Exchange gateway must always run under domain account (when using the SQL database also
faxserver) we recommend always to use domain service account. You should keep this in mind, especially when you
are installing the FaxChange on the standalone server. If you enter wrong password the installation program
will warn you.
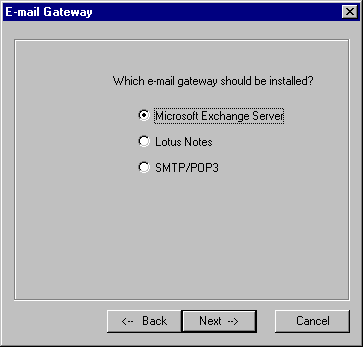 If your key contains more gateways, you must select one of them to be installed on the next dialog.
If you have selected gateway different from Exchange, read information about your gateway:
This block is related to installation with Exchange Server
After the selection of Exchange gateway, you may be advised of detected version
OS Win 2003 SBS. In such case, the service "Microsoft Exchange MTA Stacks" will be enabled automatically and registry entries will be performed. Restart is required after successful installation. Next ->
TIP: If Exchange is installed in Cluster environment (and Faxchange runs on different PC), install Faxchange normally - nothing changes from Faxchange's viewpoint. As Exchange server name enter "common" logical cluster name, not physical name of one of cluster nodes.
In case that message
If exchange address returns reference to wrong server, wrong user etc. you have set fax administrator's
profile incorrectly.
The same is valid for routing groups - if there is more than one in your organization, you must select into which routing group
Faxchange will be installed. Also you must select server for Faxchange installation, if more than one is located in administrative
/ routing group.
|
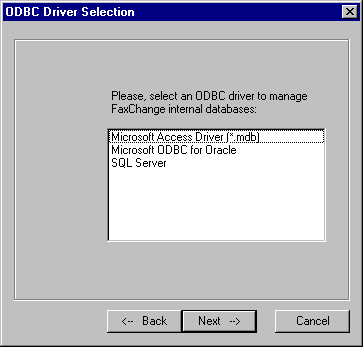 In the next dialog select database type used by Faxchange. This is not possible in express installation - it selects
MS Access automaticaly. List of available databases depends on activation key and installed database drivers.
When you are using MS Access database you don't need provide any configuration data and setup continues by entering local information.
Configuration of Oracle SQL is described in this document.
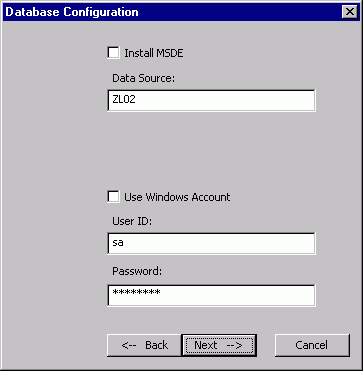 When setting up MS SQL database you need provide following data:
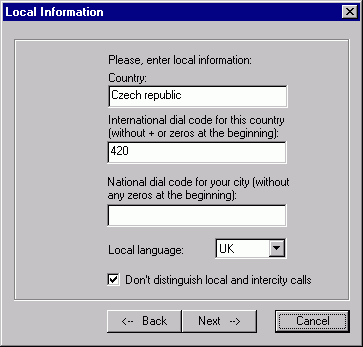 On the next screen enter information about your country - name of the country, international dial code
(without + sign or initial zeros), national dial code of your city (without initial zero, empty in CR), language used here
and how to work with phone numbers: if "Don't distinguish local and intercity calls" is checked, there are no intercity dial codes and prefixes
and numbers are dialed always in full form. If not checked, numbers are dialed with consideration of intercity dial codes and prefixes.
Default setting is for Czech Republic - empty national dial code and no distinguish between local and intercity calls.
More about dial configuration read here.
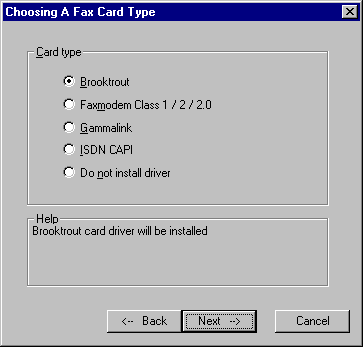 Fax hardware selection follows. At this time are supported ISDN (CAPI), Brooktrout and Gammalink cards and
Class 1/ 2/2.0 modems. If you have different card choose installation without fax driver and install driver later
(from diskette for example).
Online list of approved card
can be found at Faxchange web.
Next dialogs are dependent on the used fax card. All card installation will be described.
You can use more driver types - i.e. Brooktrout card + Gammalink card; Brooktrour card + modem etc. These
combinations however weren't tested, so we can not guarantee non problematic working. If you need
more lines we recommend to use more cards of the same type (i.e. two Brooktrout cards in one server).
|
IRQ and DMA settings must not have conflict with other hardware - cards must be switched correctly according
the manufacturer's documentation.
If you use ISDN BRI Brooktrout card then number of channels means number of used B-channels. One BRI ISDN line has two B-channels. For using ISDN PRI line read this document.
Warning - you can not combine TR114 and TRUfax cards. More informations here |
|
Complete this dialog box for each modem separately. That means how many modems you entered it is how many times this dialog box will be displayed; enter configuration for each modem. |
|
|
|
We don't recommend to use more CAPI cards from different producers - see more info here. |
This block is related to installation with ExchangeIn case of using Lotus Notes or SMTP gateway continue by registation and file copying.
Warning: Installation on Exchange 2000/2003 with Active Directory integration must be done under administrative account, which is member of Schema Admins group! If you select "FaxChange database", you must use FX User manager tool to configure rights and groups in Faxchange and perform manual synchronization to keep database current. If you select "Active directory", a new tab in "AD Users and Computers" tool appears in every user's property pages, where you can configure its Faxchange settings (of course you can still manage users using FX User manager).
To add this tab, Active Directory schema needs to be modified. If Faxchange is installed on PC, which is PDC and
Exchange server runs here, installer itself enables AD modification. But if PDC and/or Exchange runs on different computer,
it is necessary to import
Selection of directory database isn't available in express installation. |
In case of installing gateway different from Exchange other dialogs will be displayed - see appropriate link:
When you finish entering fax configuration you can register your Faxchange and copying of files to the harddisk is started. Required binary files, libraries and documentation will be copied. Then database is created and FaxChange components are installed. Name of the component being installed is displayed in the caption of installation program window.
If you are installing Faxchange on Windows 2003, dialog with sequence of enabling kernel-mode driver installation for fax conversion printer appears. Perform these steps:
This block is related to installation on Exchange only
If checkbox Install forms for Windows 2000 and newer systems is not checked (function available from version 6.0.36),
"old forms" are installed - they work correctly only if user has administrative rights on his PC (has access to all parts of
filesystem and is able to register components). This is valid for clients using Windows 9x/Me/NT4.0.
|
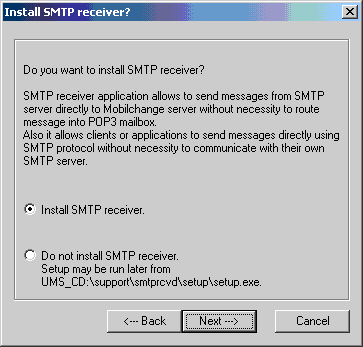 The last step is SMTP receiver installation.
SMTP receiver application allows sending messages from SMTP server directly to FaxChange server, without necessity to route message into pop3 mailbox.
It also allows clients or applications to send messages directly using SMTP protocol without necessity to communicate with their own SMTP server.
Select to installation SMTP receiver
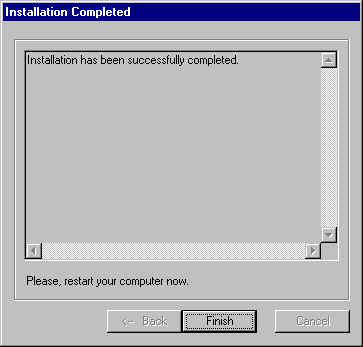 After forms copying Faxchange installation is complete. List of errors encountered during setup will be displayed in
the last window.
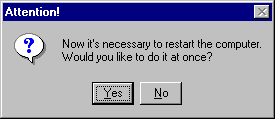 Now you must restart your computer. Before that, you can change FaxChange configuration using
fxCfg program and import users using fxUserM.
Their import is not necessary - new users will be added to the database automatically when you try to send the
first fax.
You can make sure that FaxChange has been successfully installed in the following way:
All these services should be started after restart the computer. There is also faxinit service (only for the Brooktrout card) which works only immediately after the restart and it initializes fax card. Then it is automatically stopped.
By default, Full Controll permission for Everyone is assigned to these shares. For higher security level you can set
permissions more restrictive:
Faxchange - this share is used by Faxchange services for filesystem access and by administrator for
administering purposes. Set Faxchange service account permissions to
Full Control, Administrators - Full Control, Everyone - Read (or No acces,
if faxspy utility for fax queue user access is not used).
Faxchange\fxprintq - used by users of shared NT client fax printer. Leave Everyone
- Full Control permission. In this folder are created temporary files and clients need permission to delete them.
Faxchange\etc\fxloader - there are client components instalation files located here. Set
Everyone - Read.