
|
|
Content | User documentation | Administrator documentation | Index of terms | Technical Support | Search on-line |
| Installation of clients, support for Windows 2000/2003 |
One of basic FaxChange features is that all clients components are installed automatically and without administrator's work. Forms, COM objects, FaxChange client printer... all of this are installed when user needs it. But unfortunatelly, this feature won't work on unpatched Windows 2000/XP and higher (include terminal servers).
UMS instalation CD contains tool, that sets access rights to some registry keys and directories,
so FaxChange automatic client installation can run. You can find it
in directory \support\Win2000_support\. There is a script
_fx.cmd for FaxChange users. This script should be run (for example via MS SMS server)
under administrator's NT account on every Windows 2000/XP computer (eventually terminal server),
where Faxchange client should run.
Script fx.cmd had to be modified before running; enter name of your FaxChange server to line
FXSERVER=
at the beginning of script.
If you use this script, you will lower your system's security! Therefore use rather remote installation with Remote Installer tool, see next paragraph.
Users of Windows 2000 and higher can use only shared client printer (mapped from FaxChange server), even after running that scripts. If you want to install local client printer, you have to add permission to install printer to users in Domain Security Policy tool.
Base program of those scripts is umsetacl.exe. Its documentation can
be found in the same directory.
This tool was developed to avoid necessity of coming round all client computers or buying expensive SW for remote installation (e.g. System Management Server from Microsoft). It allows to perfom installation from central point.
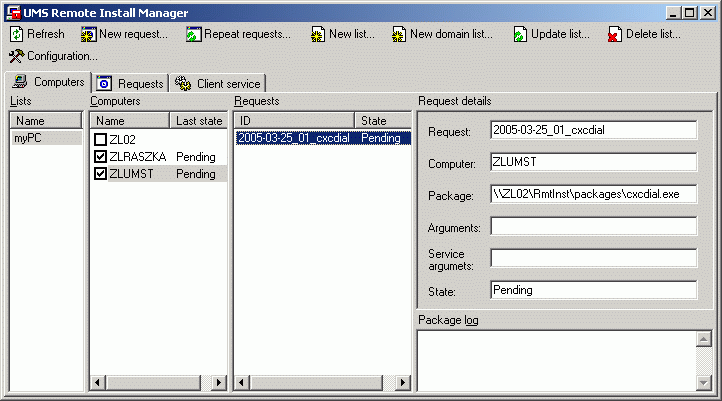
First of all you install client side, what is service running on client PC. Then administrator can create requests for package installation using UMS Remote Install Manager tool (located in Start menu). When installation request is created, client service is notified by Install Manager and service downloads the package, installs it and result of installation is sent back to the Install Manager. Client side is also installed using Install Manager, so administrator does all the work centrally.
Intranet interface is also available to save administrator's work, using which even common users can create installation requests (include client part installation). But unlike administrator, common users can make requests only for components installation on their own computers.
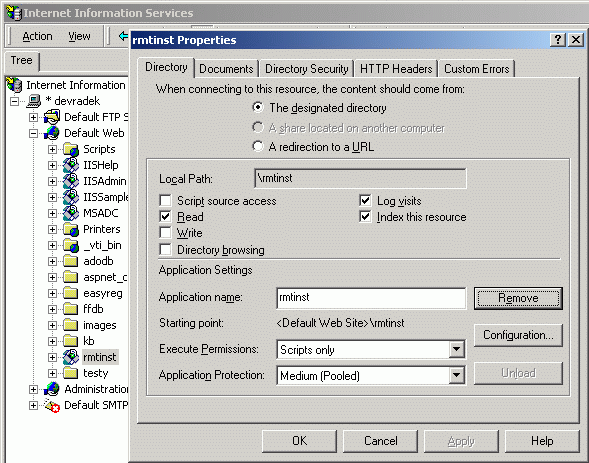
\support\UMSRmtInst folder of installation CD, run setup.exe program here.
Setup does these steps:
Installation of intranet interface can be done by this way:
support\UMSRmtInst\WebService folder from installation CD to disk on server, e.g into C:\rmtinst.
Next you must set correct permissions for correct working:
HKLM/Software/Datasys/UMS/Remote Install registry key.
| Registry item name | Config page item name | Description |
|---|---|---|
| InstallServiceDomain | Doména | Domain of account for client service installation. |
| InstallServicePassword | Současné heslo | Encrypted password for client service installation - not displayed. When changed, it is entered twice for verification. If any configuration item is changed, you must enter this password - it is security action to prevent common users from configuration changing. Better way is to secure this page by Windows authentication + NTFS permissions only for administrator. |
| InstallServiceUserName | Uživatelské jméno | Account for client service installation. |
| ListeningPort | Port pro naslouchání | Port where client service listens to (24680). |
| PackagesPath | Umístění balíčků | Network path to installation packages. |
| RequestsPath | Umístění požadavků | Network path to installation requests. |
| ServiceAccountName | Účet pro spuštění | Account for client service run (domain\name). |
| ServiceAccountPassword | Nové heslo | Encrypted password for client service run; when changed, it is entered twice for verification. |
| ServicePath | Cesta k souboru | Network path to client service file prepared for distribution. |
\support\UMSRmtInst\Doc folder of installation CD.
Creating requests by administrator
UMS Remote Install Manager window contains three tabs:
You can also create requests for package instalation - select one or more PCs and after pressing "New request" list of available packages is displayed. Select which one you want to install and set parameters. Request is displayed in Requests listbox for selected PC; when you click to request, details and log about processing are showed.
Also lists of packages are supported together with individual packages. List is file with .list extension located
in the same folder as normal packages. Every line of this file describes installation of one package in this syntax:
"Package name.exe" "package parameters" "installation service parameters".
Quotations can be left out, if given item doesn't contain spaces.
Request for installation of package list named Default.list (if such list exists) is automatically added to
request list during installer service installation on target computers. Administrator can save some work with requests
definition in this way - simply creates list of necessary packages and then only installs installer service.
Creating requests by comon user
User starts web browser and enters address in form http://server/RmtInst/NewRequest.aspx?InstallClientService=true&PackageName=package,
where:
server = server name, where intranet interface for Remote Installer is installed
RmtInst = virtual directory of intranet application, you can get it from administrator
InstallClientService = install client installation service? (true=yes/false=no). If this expression is missing, false is used (client
service is necessary to install only during first use)
PackageName = name of package to be installed, INCLUDE extension (e.g. DsSetup.exe). Must be always stated.
PackageArguments = possible parameters for installed package.
List of packages necessary for FaxChange client installation: