|
|
Table of contents | User documentation | Administrator documentation | Documentation for developers | Technical support | Search on-line |
| CallChange installation |
This document guides you through CallChange server installation. But please first read document Before installation.
Log on to Windows under the same account which will be used by CallChange services.
Installation is started by autorun.exe program in the root folder of installation CD.
Select CallChange product in the menu and CallChange Server [Run setup] in next dialog.
Installation is guided by setup wizard, which helps you to smooth passing whole procedure so setup will be finished successfully
and CallChange will work corectly.
When setup is started (by Autorun or \CallChange\Server\setup\setup.exe program), setup engine is copied to your
harddrive and restart can be acquired -- in that case restart the server and start setup again. Then first wizard's dialog
appears.
Setup by default configures Calchange search server to use Exchange server. If you want to switch it for Lotus Notes, you must do it manually, read here.
|
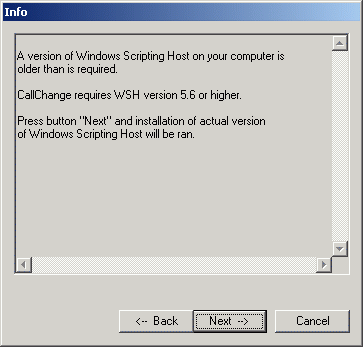
Setup first checks for correct Windows Scripting Host version. If it isn't found, you'll be prompted to install it. Press "Next -->" and WSH will be updated. |
|
|
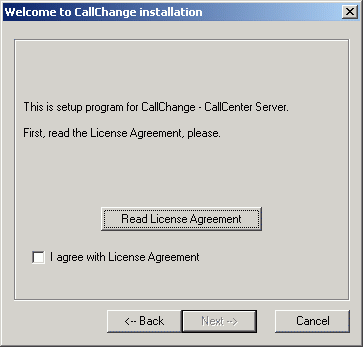
| Now you are promted to read license agreement and confirm you are accepting it. Without agreement setup can not continue. |
|
|
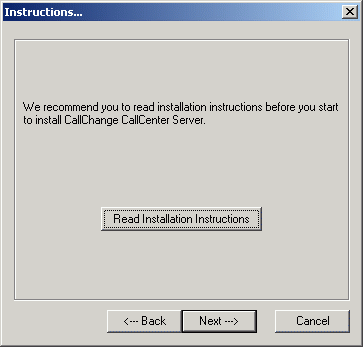
| Next dialog offers reading of installation directions. Directions from installation CD are displayed, the most actual version can be found on the web. |
|
|
| Now select CallChange components you want to install (standard, enterprise, callcenter). Information about components are described here. For every component you need separete activation key. |

|
|
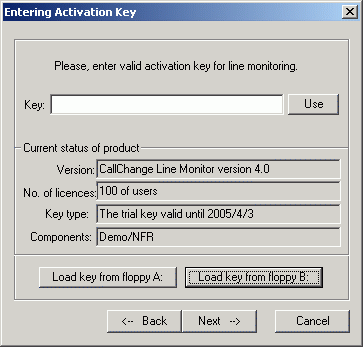
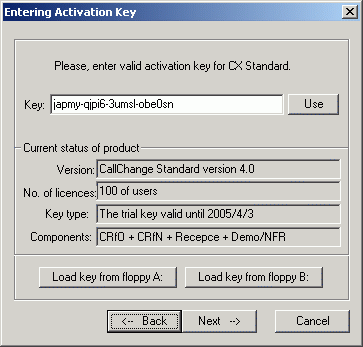
Enter individual activation keys (sequence of letters and numbers - do not exchange number 1 with small L!) after component selection.
Key for line monitoring is entered always first. Keys can be stored on the floppy disk in file with appropriate name, then you can
read them from the floppy drive A: or B:
|
|
|
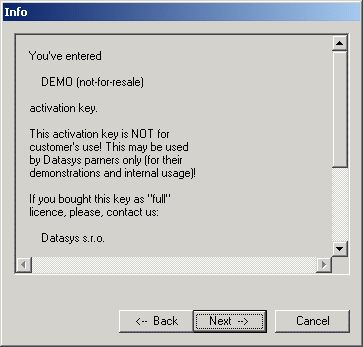
| If your key is for demonstration or internal use only, you'll be informed by info dialog (this applies to all keys). |
|
|
| Enter keys for other components (standard component here). |
|
|
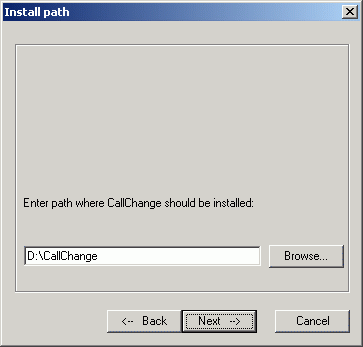
| Select folder, where CallChange server will be installed into. |
|
|
| Select webroot folder of Internet Information Server (root path where web pages are published). |

|
|
|
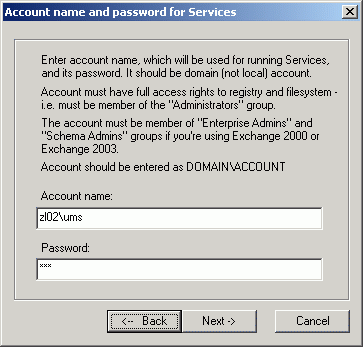
Enter domain account in form domain\account and its password under which CallChange services will be run.
This account must have administrative rights (necessary for registry access).
If standard component wasn't selected, next 3 dialogs will be skipped and setup continues here. |
|
|
|
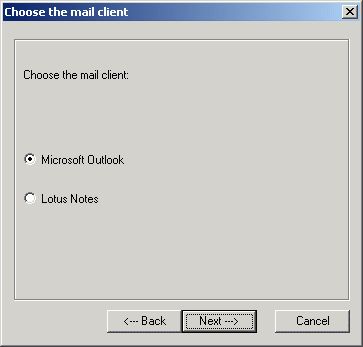
If standard component was chosen, select e-mail client now - Outlook for Exchange server or Lotus Notes, if
you are using this system.
You can not continue until Outlook is running. WARNING - Outlook must have Collaboration Data Objects component installed, otherwise setup stops. Default Outlook installation doesn't contain this component - you must explicitly select it during setup. If Lotus Notes system was chosen, next 2 dialogs will be skipped and setup continues here. |
|
|
|
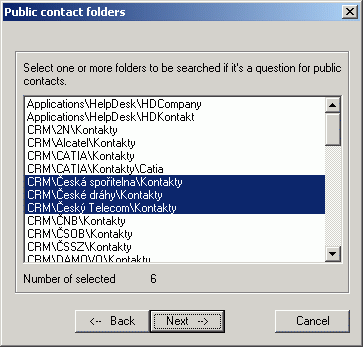
Select public folders, where public contacts will be searched. You can select more folders by pressing Ctrl key + mouse click
or nothing can be selected.
Only folder with contacts are displayed. If you need to refresh folder list (when some folders were added), press "Back" and then "Next" in the previous dialog window. |
|
|
|
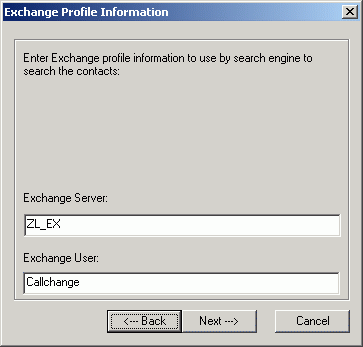
Enter information used by CallChange for connecting to Exchange server - Exchange
server name and mailbox name. ATTENTION - account selected for CallChange services must have access to this mailbox. Therefore is good idea to be logged in under this account during installation and to have Outlook propfile configured for this mailbox. |
|
|
|
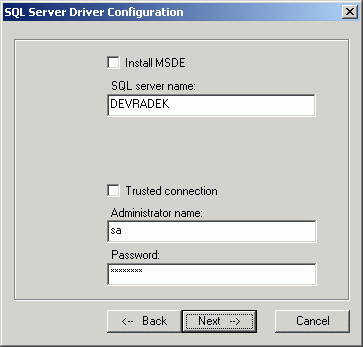
Now CallChange database will be configured. Database is stoted in MS SQL server - if you do not
have it, check "Install MSDE", this installs MS SQL Desktop Engine (desktop version of SQL). Database parameters:
If MSDE installation was acquired, it will be started after presing "Next" button. If restart is required at the end, press <No> button and stop CallChange installation in the next dialog. Then restart your server and run CallChange setup again. IF MSDE installation doesn't require restart, continue in CallChange setup. |
|
|
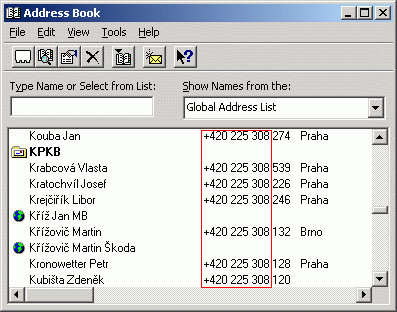
For correct standard component of CallChange function must have every user filled in phone number in his properties.
You can see view from Outlook to global address book of MS Exchange server on the picture. All users have phone number in form "+420 225 308 xxx", where "xxx" is extension number. So common part of phone number is "+420 225 308 ". |
|
|
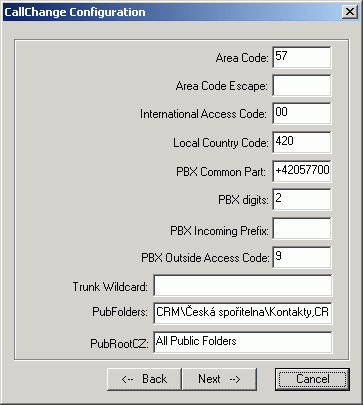
Here is done configuration of PBX properties and contact searching:
|
|
|
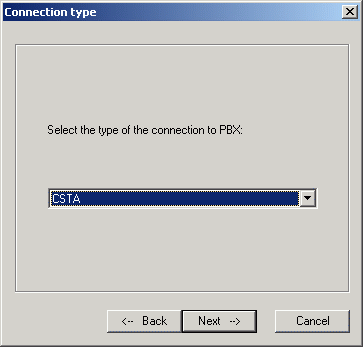
Now select PBX to CallChange connection type, setup goes by different ways according this:
|
|
|
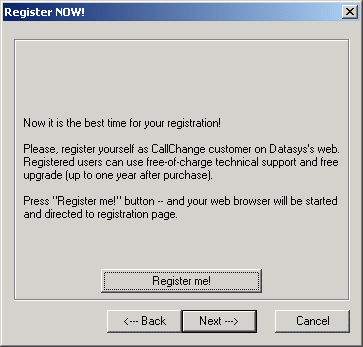
| You can register at the end, what allows you to access technical support. |
|
|
|
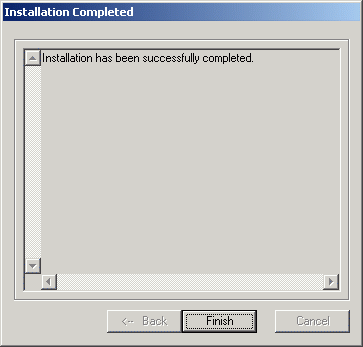
Now is done CallChange setup - copying of files, services registration etc.
Finally, window with list of setup errors is displayed; if all is done without problems and no error occured,
windows looks like this: |
|
Create a new user for this purpose (if you are using also other Datasys UMS products, you can use user in which context
these products run, so user account can be shared) and store his ID file to the local disk. Log on to Windows under search server's
service account, configure Lotus Notes client using ID file mentioned above and close the client.
Copy notes.ini file from Notes program folder (typically it is \Lotus\Notes) into css.ini file ibidem and add
EXTMGR_ADDINS=CSSAUTOPW line to the end of file. Write filename and path to this file into ln_ini_file registry value.
Password for ID file is written into registry using cssenc.exe program, start it with password as parameter.
ProviderType=LN, GetUserModeOnly=0. According your needs set other LN provider
settings (UserProperties_LN, Costs_LN, phone number mappings).