|
FaxChange installation with Kerio MailServer step by step
|
Kerio MailServer is SMTP mail server with user access through POP3 / IMAP. More info here.
FaxChange can be installed against Kerio MailServer in the same way as like against common SMTP/POP3 server. FaxChange server
installation is started from autorun screen of installation UMS CD or by executing <CD>:\FaxChange\i386\server\setup\setup.exe program.
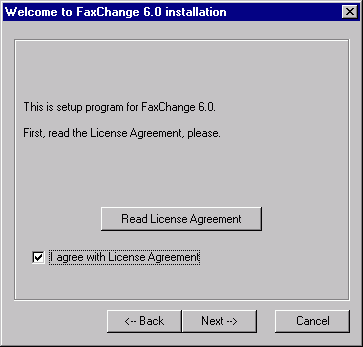
- After starting installation go through several info dialogs with license agreement and reference to product documentation:

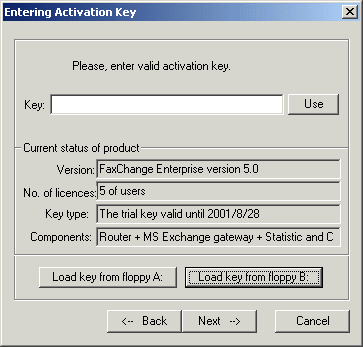
- Next appears dialog for activation key entering.
Write key into text field and confirm it by pressing Use button, then you can continue by Next button.
If key is correctly entered and accepted, information about it are displayed - key version,
number of client licenses, what components it contains etc.
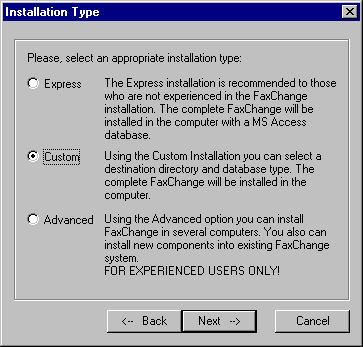
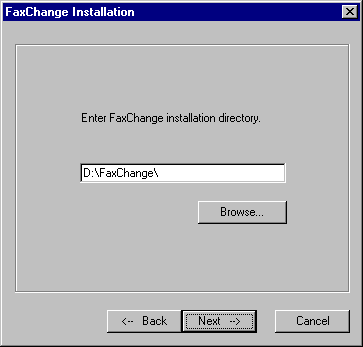
- Now select installation type. We recommend to use Custom installation, which is described
in the following text. Next step is selecting of folder, where FaxChange server will be installed to.
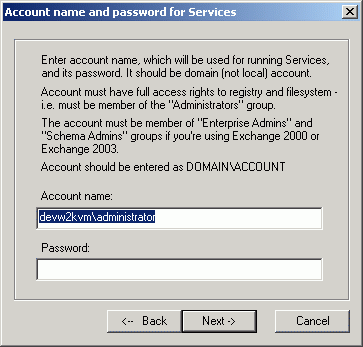
- You need to select appropriate account used for correct running FaxChange services.
If server where FaxChange is to be installed is member of domain, use account in form 'domain\account'.
If server is standalone (not member of any domain), use local account in form 'server name\account'.
In both cases account must have local administrator privileges and if server is domain member,
also Domain Admin privileges.
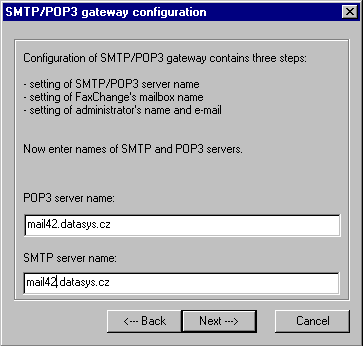
- Now we will configure connection to Kerio MailServer. FaxChange communicates with Kerio server using SMTP.
Fill both fields (POP3 server name, SMTP server name) with name (or IP address) of server
where Kerio Mail is running. If FaxChange is installed on the same server as Kerio, you can write
127.0.0.1 into both fields.
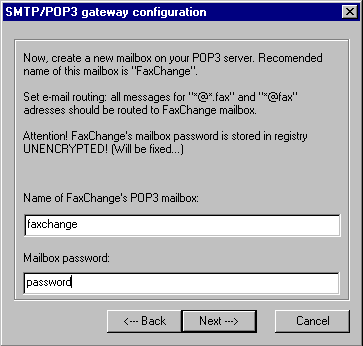
Leave Name of POP3 mailbox and Mailbox password empty in the following dialog - POP3 is not used in this case,
communications use SMTP protocol only.
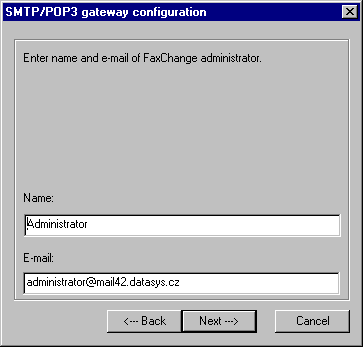
- Enter name and e-mail address of FaxChange server administrator here. Administrative messages like info about adding users
to the database, conversion errors or problems with FaxChange services will be sent to this address. WARNING - address offered
by setup is usually not correct, enter real address.
- Installer automatically select Access database for storage of user settings, routing rules,
fax communication etc.
Fill your local information in the next dialog.

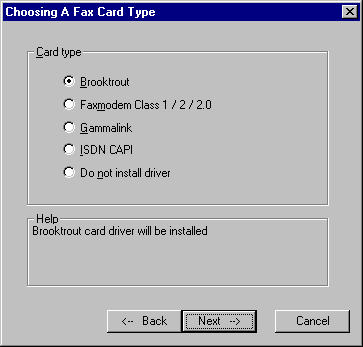
- Fax harware selection follows. This part is not described in detail because of vendors and hardware diversity.
Read more information here.
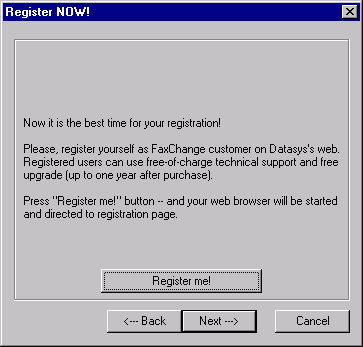
Last dialog in setup process offers registration of your FaxChange server.
- Now is started installation - file copying, service registration etc.
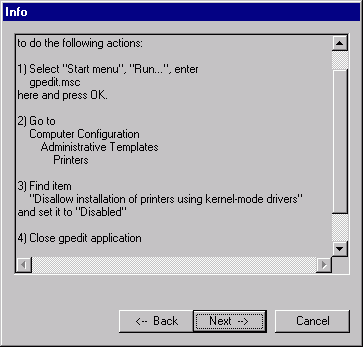
If FaxChange server is installed on Windows 2003 system, you must allow to install
kernel mode printer drivers. This is necessary for correct fax converter installation.
Dialog gives you exact description, how to set this options up.
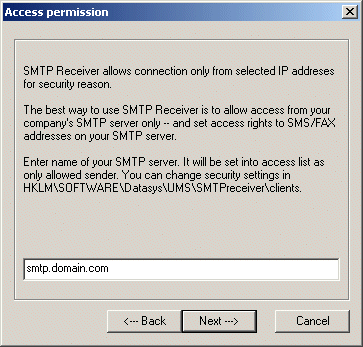
- Another step in setup is SMTP receiver installation.
Enter list of server names (IP addresses), from which SMTP receiver will accept
SMTP connections. In our case enter name/address of Kerio MailServer. If FaxChange is installed
on Kerio server, enter 127.0.0.1 here.
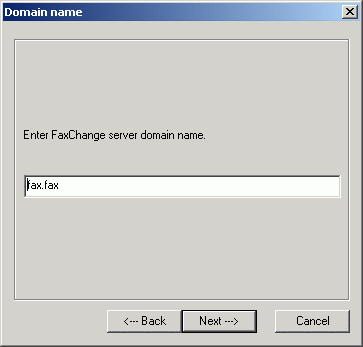
Enter 'fax' domain in the next configuration dialog (fax.fax in this example) - messages sent to this domain will be processed as a faxes.
So if you want to send fax to 225308454 number, use 2253084542@fax.fax address.
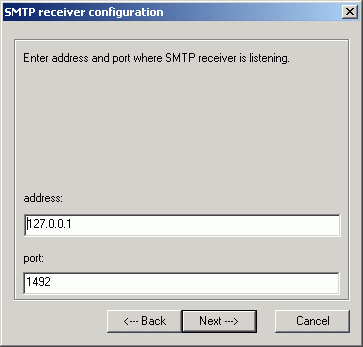
- Next enter SMTP receiver configuration - IP address of server, where SMTP receiver runs and port, where it will listen to.
If Kerio and FaxChange are located on the same server, you can use 127.0.0.1 address.
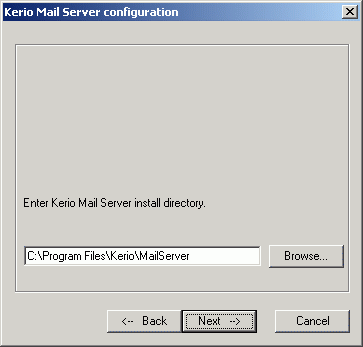
Select folder, where Kerio MailServer is installed (where mailserver.cfg file resides) - information about fax domain will be saved into its
configuration. If Kerio runs on different server, you must enter path using mapped network drive (UNC path is not supported).
- Now we are at the end of FaxChange server installation. When files are copied,
you get resume about installation. First message gives you information about SMTP receiver
configuration, second one contains summary about FaxChange server installation.

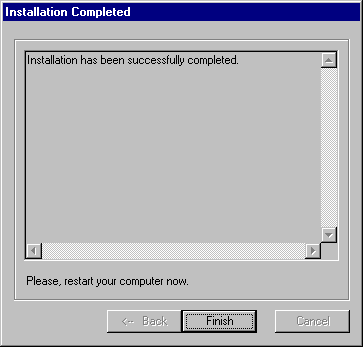
- FaxChange server installation is now completed and setup offers you to restart
the server. FaxChange is ready to work after reboot completion.
back to top of page
